So, yeah.. I should explain myself.
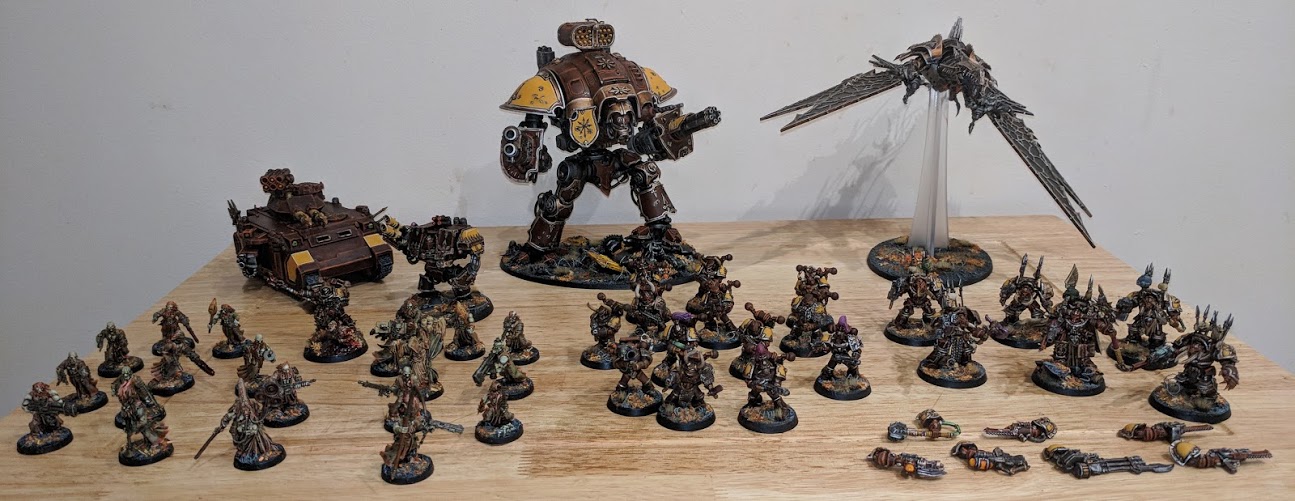
Somewhere around March, I got the idea stuck in my head that I wanted something superheavy for my Space Wolves. This was somewhere in the period where I was just churning out hours of quality hobby time, and really tearing through my backlog of Space Wolves. I’d cranked out 10 Wulfen, converted my Rhinos into optional Razorbacks, built and painted some plasma guns, vexillas, some more bodies with bolt pistols or combat shields. My Wolves were sorted for gaming in 40K and I had a zillion options for the Horus Heresy. Things were going well. Extremely well. And I wanted a challenge. I had to go bigger.
I started looking at Thunderhawks, and Warhound Titans – the largest, and most glorious ForgeWorld models that I could feasibly see myself fielding in a game. After some hours of hovering over the ‘Place Order’ button, my brain returned to a state of somewhat sober thought, and I bought a Legion Fellblade instead.
All things considered, it was a fun project and makes for a glorious resin centrepiece for my Wolves, contested only by my Fire Raptor (a challenging, but thoroughly rewarding project), but it wasn’t a Titan. I started looking for ways to justify my ravenous lust – it was my birthday in April, and I had a bonus coming in my payslip for the end of month.. the game changer was finding a buyer for my Chaos Space Marines.
As I’ve mentioned in a previous post, my Chaos Space Marines – the renegade Autumn Walkers chapter – were my first foray into Warhammer 40,000 at the time that 8th Edition dropped. With nothing in particular really standing out to me, and not wanting to wait for the release of the shiny new Death Guard, Chaos Space Marines were the functional choice – they let me use my Bloodletters and Plaguebearers as allies to bulk up the force, but there was still plenty of boltguns and power armour and all the classic hallmarks of Warhammer 40,000 in there to get me jazzed about the new system and setting.
I had some good hobby times with this army, from the initial week of getting something ready from scratch in time for the release of 8th Edition 40K – that is, a Sorcerer, 5 Terminators, 10 Marines, a Heldrake and a Predator – to my ambitious Flagellant/FW Renegade Guard Cultist conversions, and my heavily magnetised and modular Renegade Knight (a truly joyous kit to assemble, that at the time gave me the same feelings of scale of undertaking as this Warhound does now). I spent time on each and every tactical Marine as I went along, trying to ensure a degree of individuality on every miniature. This is the army that got me back into Warhammer 40,000 and the journey was an utter joy to undertake. What a shame then that I so hated the destination.
I don’t want to say that Chaos Space Marines are bad in 8th Edition, because they’re not. Just about every direction that I wanted to take this army in however, the rules were mediocre at best or frustrating and boring at worst. As someone with a Hobby-First kind of mentality, this wouldn’t have been enough to discourage me altogether – indeed, I can’t tell you the number of games I continued to field Terminators in despite increasing clarity that they were an utterly awful choice. The further I went along with this army, however the more areas I would find lacking or frustrating, the fluff felt at odds sometimes and the miniature range was, at times, very trying.
Chaos Space Marines are a fairly venerable range of miniatures – no doubt about that. Their most basic foot troop counterparts are one or two iterations behind the old style Space Marine Tactical Squads, and that’s saying nothing of the new Primaris range of miniatures. The Primaris Space Marines constantly felt like an impending, looming threat that said that one day, your collection will be outdated and replaced with newer, “better looking” models whose design and proportions felt like such a radical departure that it made them impossible to dismiss as simply “new sculpts.” The old adage of “rules come and go, collect the models you think are cool” felt like it held a lot less water – indeed, I could wait out my Chaos Space Marines army, hoping for a 9th Edition or Codex Revision that might make the Space Marines portion of the army effective and fun to play again, but would my models that I worked so hard on be puny and outdated looking by then?
More and more, I found myself tending to prefer taking my Heresy-era Space Wolves as my army of choice in Warhammer 40,000. Despite being an army that has no hardback codex for this edition, and despite the collection mostly comprising of Heresy-era toys with the occasional 40K-exclusive sprinkled in where appropriate (Razorbacks and Wulfen, for example), this army never really seemed to fill me with the same levels of dread as my Chaos Space Marines. From a gaming standpoint, it’s still a fairly low tier army – being both Space Marine and one of the few armies without a codex at this point in time – but the promise of late-stage Codex gives me a little hope for interesting units and stratagems, and the sheer scale and versatility of my model collection let’s me keep things fresh until then. From a hobby/collecting standpoint, the nature of the project as a Horus Heresy legion gives me a little armour from the Primaris-centric future of Space Marines – where one day, the Space Wolves chapter in Warhammer 40,000 might comprise purely of Primaris Marines, the Horus Heresy game just isn’t changing over to Primaris-scale any time soon, giving my Heresy Marines a feeling of permanence of purpose that my 40K-only Marines lack entirely.
The final nail in the coffin was my Iron Warriors Heresy-era army project. I don’t want to get into the specifics of this yet, but it’s happening and I’m making some good progress with it. I’ve always been a fan of having two diametrically opposed armies for any system that I’m into – in this case, I’m adding a shooty Traitor Legion as a counterpart to my choppy Loyalists – which is sensible for playing games of the Horus Heresy, but the bottom line is that it brings my Warhammer 40,000 army count up to 3, all of which are Space Marines and 2 of which are Chaos Space Marines. With no real need or desire to own 2 non-super-competitive Heresy-scale Chaos Space Marine armies, that was the end of the Autumn Walkers.
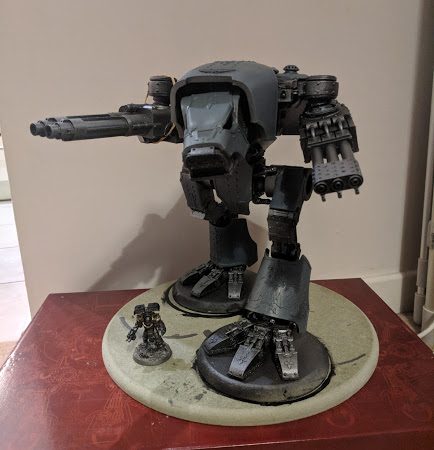
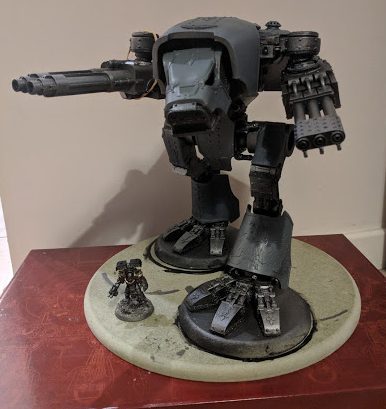
Sad as I was to see my first (but, frankly, roughest painted) Warhammer 40,000 army go, I did get a fairly reasonable price for the army that – roughly – worked out at the price I paid for it, and it (just about) paid for my latest madness, a ForgeWorld Warhound Titan with Inferno Cannon and Turbo Laser.
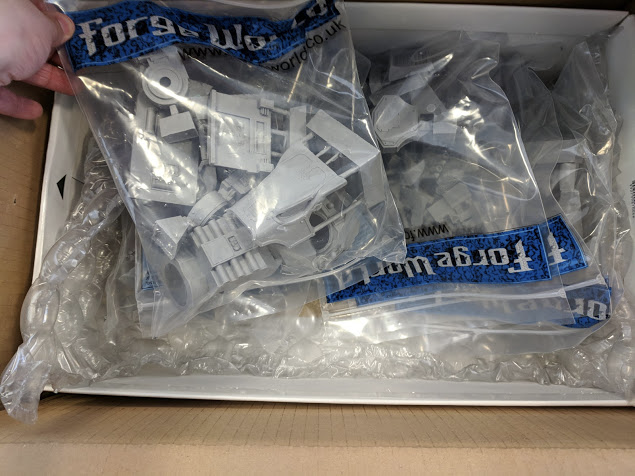
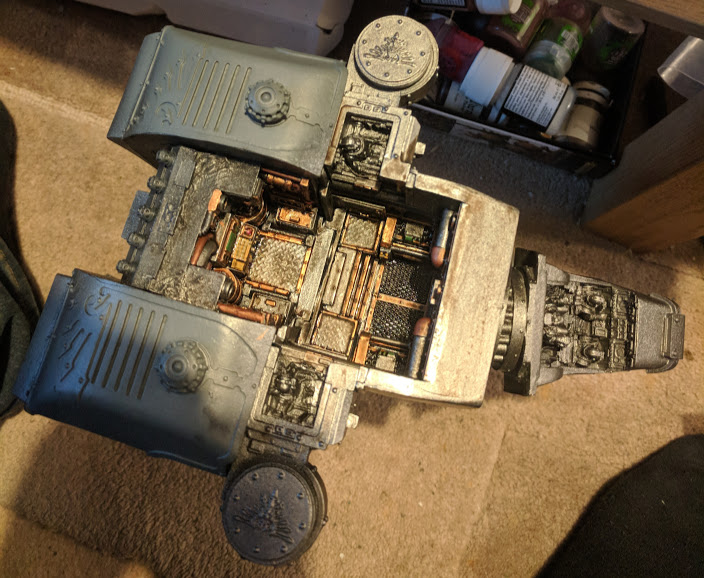
I won’t go too in-depth of the build of this thing – there’s better resources out there than I can provide out there – but I’d like to cover a couple of mistakes I made and the reasons for some of my own deviations. The basic process was about the same as anyone’s – washing the resin, removing the keys, building and basing the feet, then the legs, then the main chassis, head, and weapons. I didn’t do a lot of painting in sub-assemblies, as the process creates way too much clutter for too long and I’m a very impatient man – however, I did concede to laying down the base coats and washes over the interior before assembly, to ensure every nook and cranny would get proper coverage even with inspection with a torch or a camera flash.
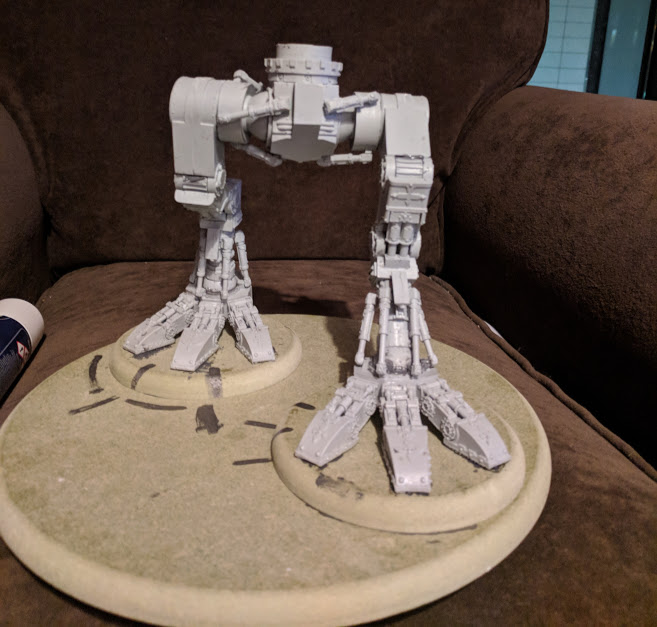
The first decision was whether or not to base it, and what to base it on. I’d done a fair bit of research into how to best assemble the model, what pose to go for and it’s impact on gameplay and stability. The consensus was generally that some form of basing really helped it’s stability, but too much basing severely impacted it’s playability on the tabletop – depending on the pose, a Warhound might take anywhere from a 9 to 12 inch diameter base, and a fully circular base might be difficult to navigate around scenery, let alone other models. On the other hand, I wasn’t the biggest fan of the snow-shoe style of basing, and some of the huge, detailed bases I’d seen on these models really helped demonstrate their sense of scale and presence. Both were valid and important considerations – it’s an impractical, highly pointed and difficult to transport model that won’t see a lot of tabletop time; I wouldn’t have purchased it if I didn’t enjoy the challenge of assembling and painting it – for a project like this, aesthetics are hugely important. Still, I paint Warhammer miniatures and not Airfix/Tamiya scale models because I enjoy the gaming as well – why make life harder for myself? Thankfully, I found a compromise.
I purchased three circles of bevelled, 12mm chipboard-style wood from a seller of eBay – one big ol’ 12 incher, and a brace of 5s. The idea here is that I have two, standalone snowshoes for the Titan to provide it with a little extra stability and balance on the tabletop (not to mention the huge benefit having both feet welded firmly to a flat and stable surface when constructing the legs), and a big display base to quench my aesthetic thirst. Hey, it’s an expensive model, from both a financial and time/effort standpoint, so why not have my cake and eat it?
Yet to arrive – but key to the final step in my master plan for this base is two sheets of corkboard. One 9mm thick, the other 4mm. The plan here is to glue them down in two layers, with the bottom 9mm layer having holes big enough for the snowshoe bases to inlay, and the top layer having a few additional holes cut out for additional base decoration – a couple of Space Marines, or perhaps even a Dreadnought – to provide a reference for the scale of the machine – and it lets my actually use those Marine models rather than gluing them directly to a base (as well as swapping them around). Beyond the corkboard, I’m planning on adding some classic 40K Gothic Ruins, tank traps, razor wire and oil drums to the base to really give it a sense of diorama. More photos to come, in that regard.
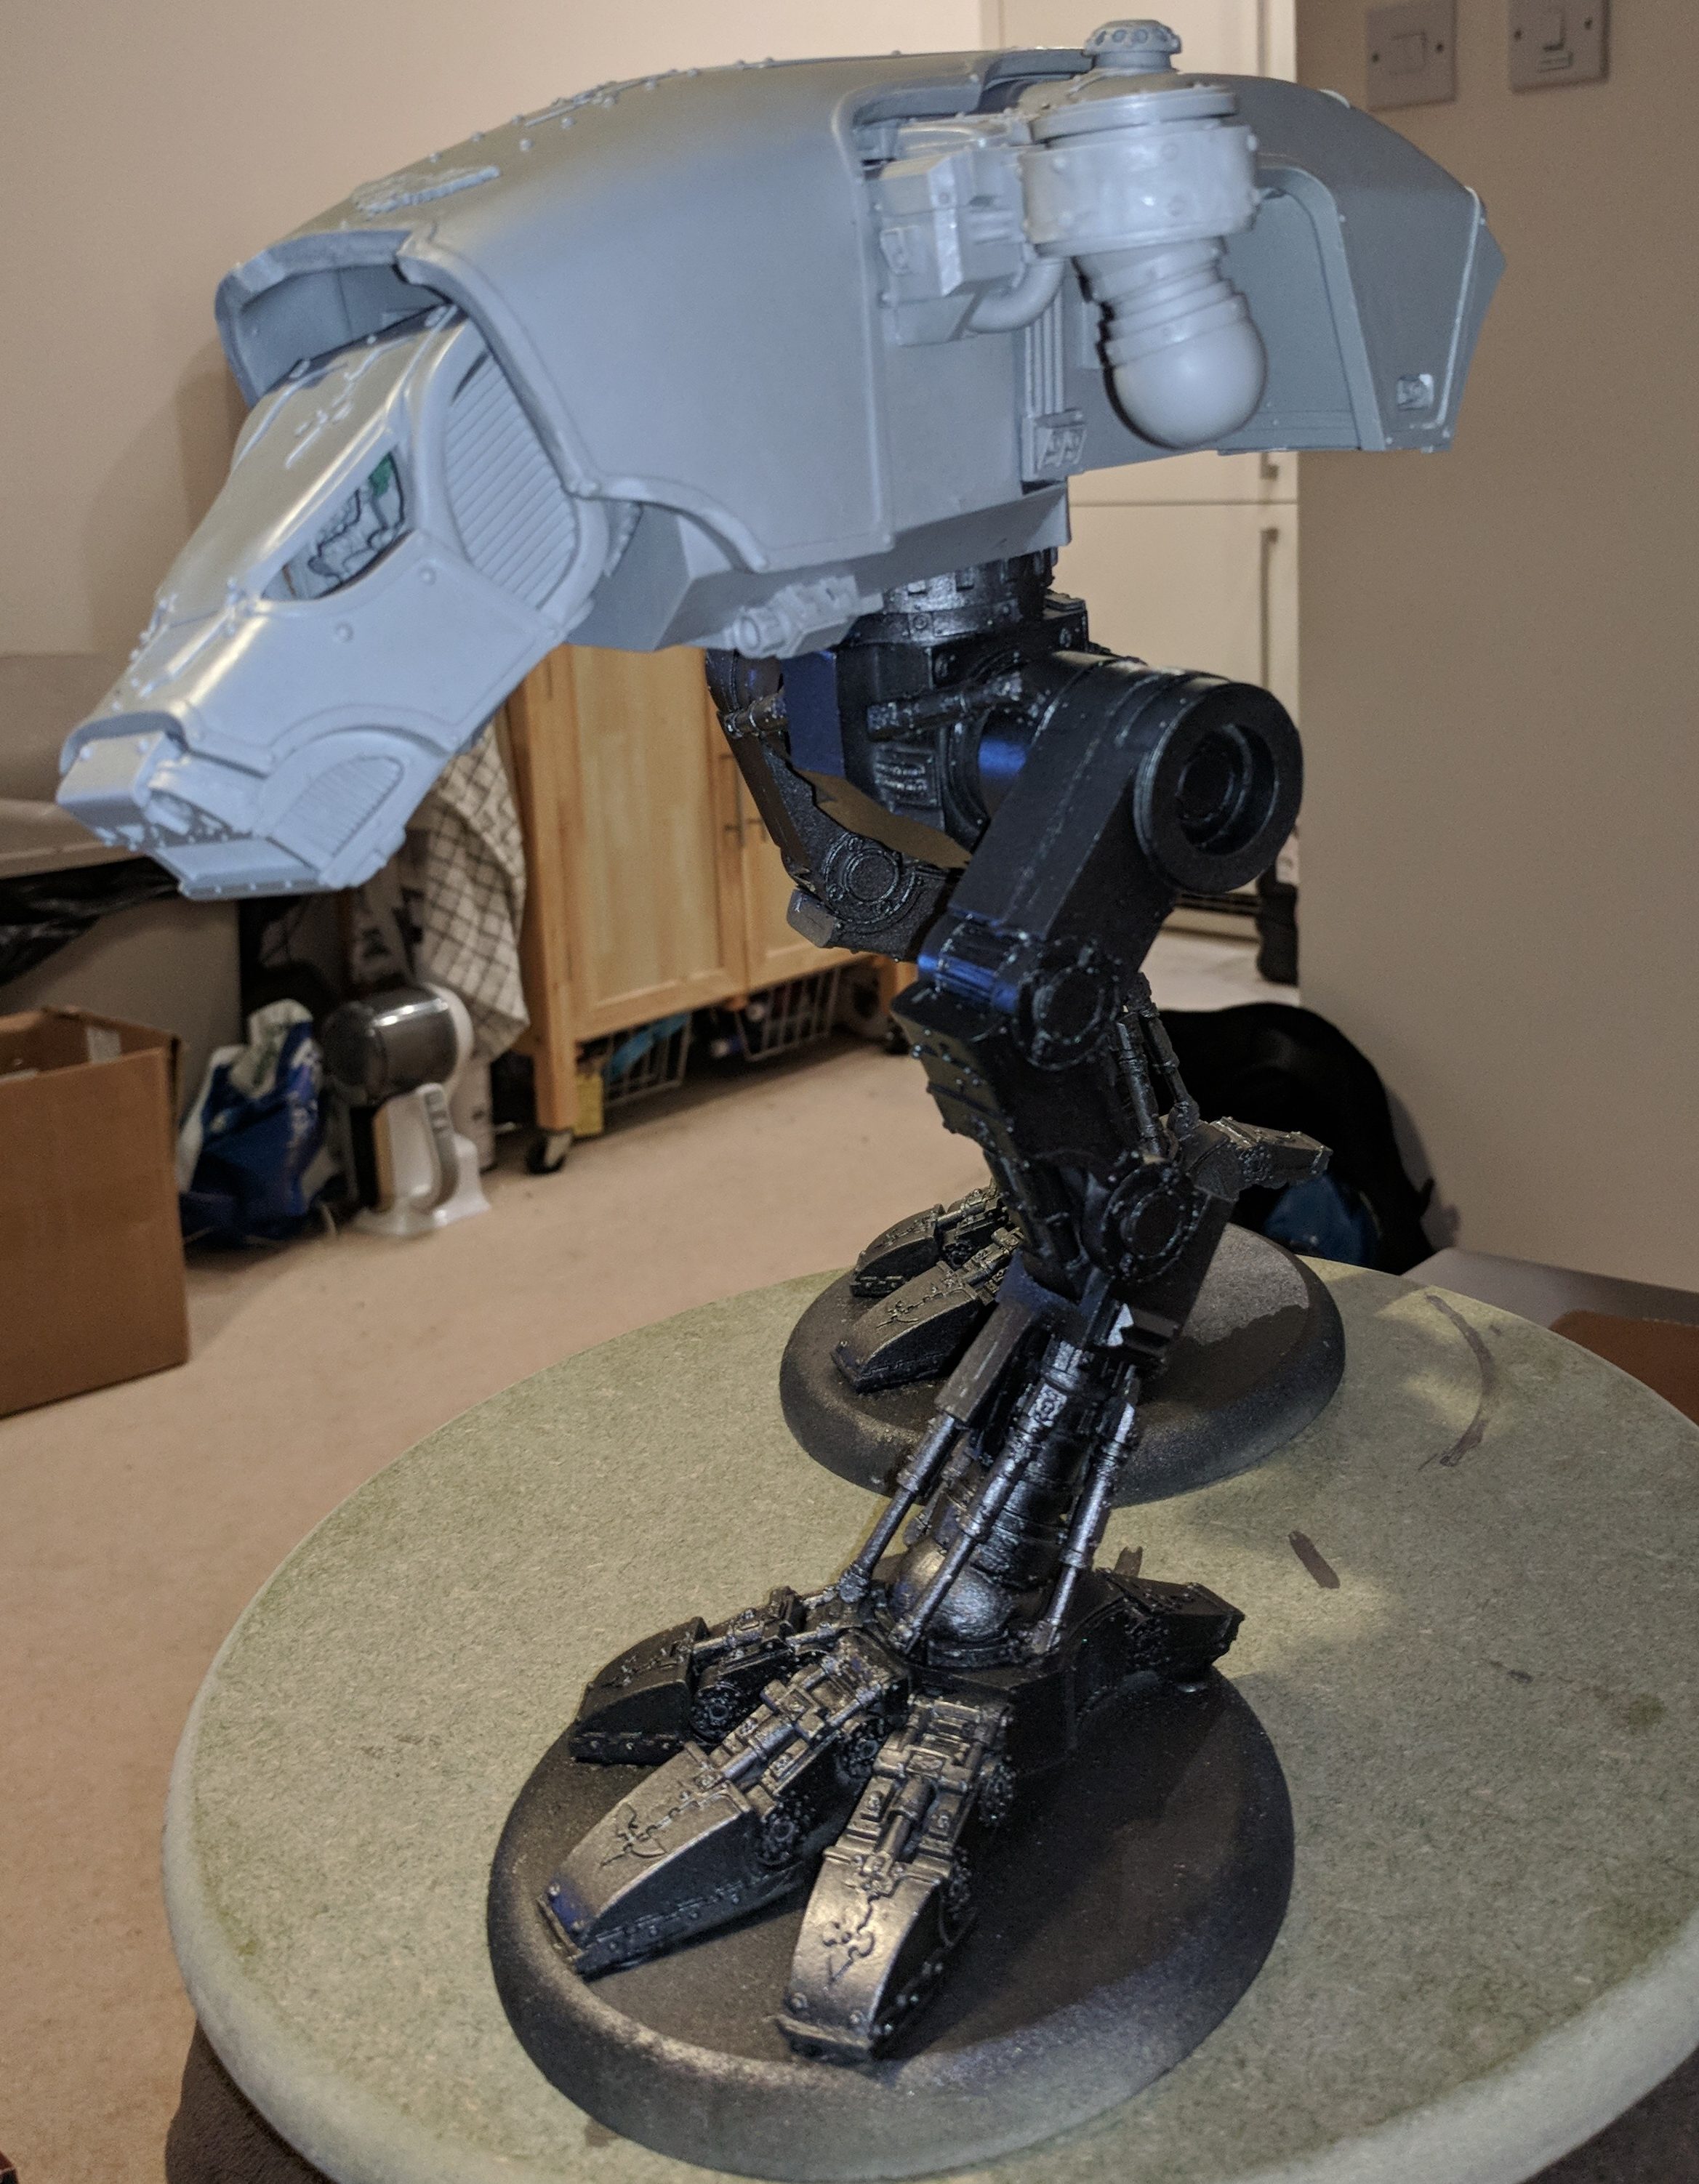
Next step was priming the metallic frame on the legs (without any unnecessary armour plating) and building the main hull of the Titan. I dry-fitted the pieces together first to ensure that when I did put the thing together, it had enough space to comfortably remove the top armour plating and reveal the interior.
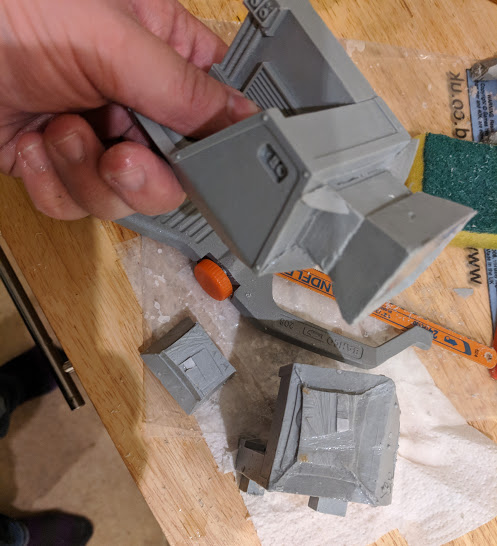
I’ve yet to post a proper retrospective on any of my armour, but despite my innate hatred of the messiness of sub-assemblies, I’m a huge geek for painting interiors wherever possible. For my Space Wolves Legion, both Rhinos and my Spartan have working hatches and fully painted interiors, as well as my Fire Raptor having removable turret hatches and a painted cockpit (no removable rear hatch though, but that thing was an absolute nightmare to assemble and I draw the line at making life considerably harder for myself. Thankfully on both accounts, the interior of the Warhound Titan is at once richly detailed and also not the bigger pain in the ass to work on. Due to the shadowy, claustrophobic nature of a Warhounds deck and cockpit, the interior-geek wanted to ensure that I got a full base coat coverage everywhere even when looked at with a flashlight. The compromise I made was giving the interior a quick base coat and wash before fully assembling the hull sans the separate interior wall piece – the details and highlights and aforementioned wall could go in after assembly. With that done, I spread epoxy all over the joints and edges, and put a couple drops of super glue at the extreme corners and put it all together. The super glue reacts with the epoxy, and so care was needed to be keep the two separate, but it dries a lot faster than epoxy and so is handy for keeping the bits together while it cures properly. Similarly, I epoxy’d the waist to the legs – preferring stability over ease of transport – and used superglue at the base joints to keep it steady while it cured. At this point, I primed the armour plates for the legs, etc and glued them to the leg frames.
With the main hull assembled, all that remains were the weapons. I opted for the perhaps slightly unusual option of Turbo Laser and Inferno Cannon because ruuuule of coooool, baby! Something about those big huge laser chambers has me excited to paint up a big bright green laser gradient – and while I really loved the looks of the Vulcan Mega Bolter.. something about the Inferno Cannon just appealed to me more. Maybe because I loved working on the heat-staining on my Fellblade, and wanted the opportunity to improve it. From a practical standpoint, the pairing I think worked out quite well as the Inferno Cannon works well with the Warhounds speed as a means for flushing heretics out of a foxhole while the Turbo Laser blasts a hole in anything armoured.
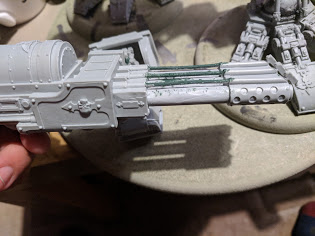
The weapons were quick and easy to put together and surprisingly detailed. The only real faff was cutting out the flat resin areas underneath the gas pipes under the inferno cannon – I managed to snap a couple of the pipes off as I was cutting away and this required a whole bunch of gluing and green stuff smoothing to get right. After a bunch of dry-fitting to figure out the pose, I epoxy’d the the ball socket widget into the main chassis and let it cure before I did the same for the weapon. I held these in place overnight with a combination of rubber bands and tiny drops of superglue at the top of the sockets to keep them in place while the JB Weld cured… and with that, assembly was completed!
So, that’s just about covers the assembly portion of my first (and most likely last) Titan. Next time, I’ll be covering how I painted and based this monstrous God Machine.
Thanks for reading, and happy wargaming!